Particl Desktop
Particl's main GUI wallet with most of the features, including Particl Open Marketplace
Recommended for beginners and majority of users
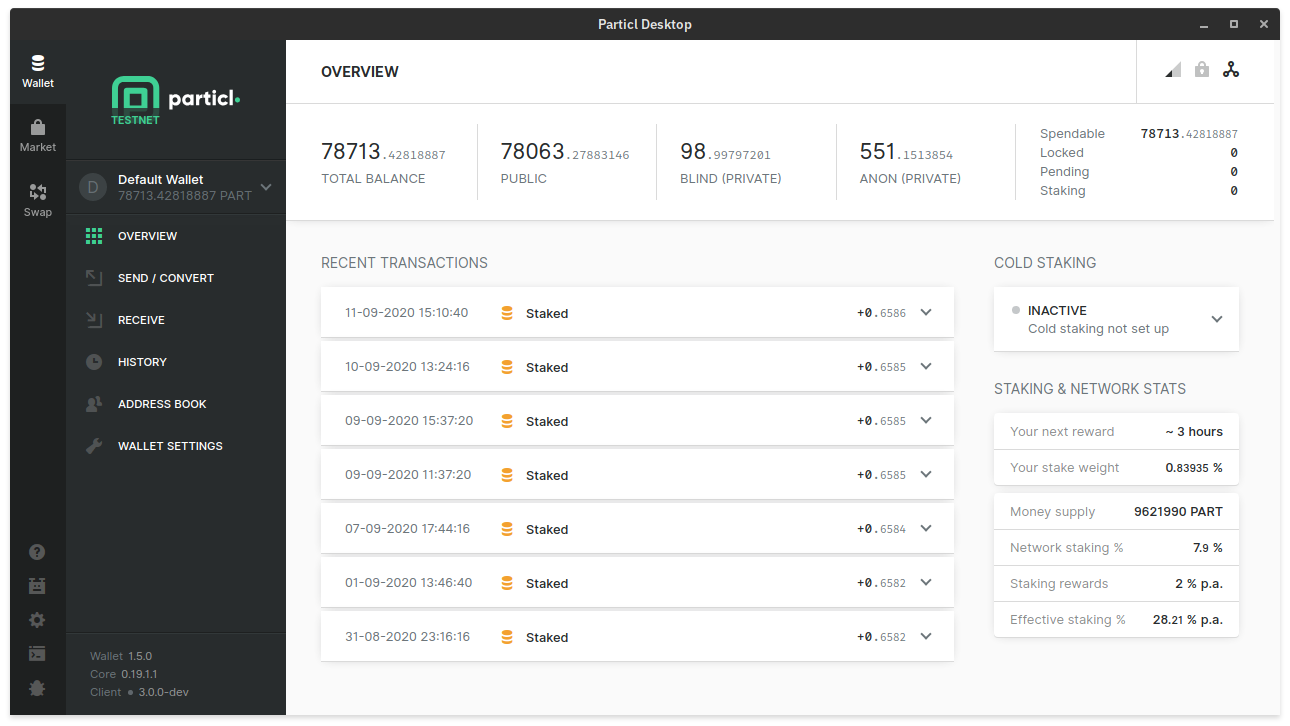
While it does not currently contain all advanced features (like Particl Core), Particl Desktop is a recommended wallet for majority of users.
This wallet is intended to be the centerpiece and default wallet of the Particl platform and is heavily under development. More features are added with every new release.
Browse & compare Particl Desktop’s features with other available wallets.
Never download Particl clients from 3rd party websites!
Hackers and bad actors are constantly trying to distribute malware-infected versions of popular cryptocurrency wallets, so they could steal your coins! Always download from official sources only!
- Download the latest version of Particl Desktop
- Verify the downloaded wallet to make sure you have the proper download and not a fake/malware-infected wallet
- Extract the content of the ZIP file to any location on your computer
- Launch Particl Desktop:
Particl Desktop.exe file.Particl Desktop executable file../"Particl Desktop".- Wait for Particl Desktop to load and download the latest Particl Core daemon version – this will happen automatically on launch each time a newer version of daemon is available
- Read and accept the terms and conditions if you agree with them to start using Particl Desktop
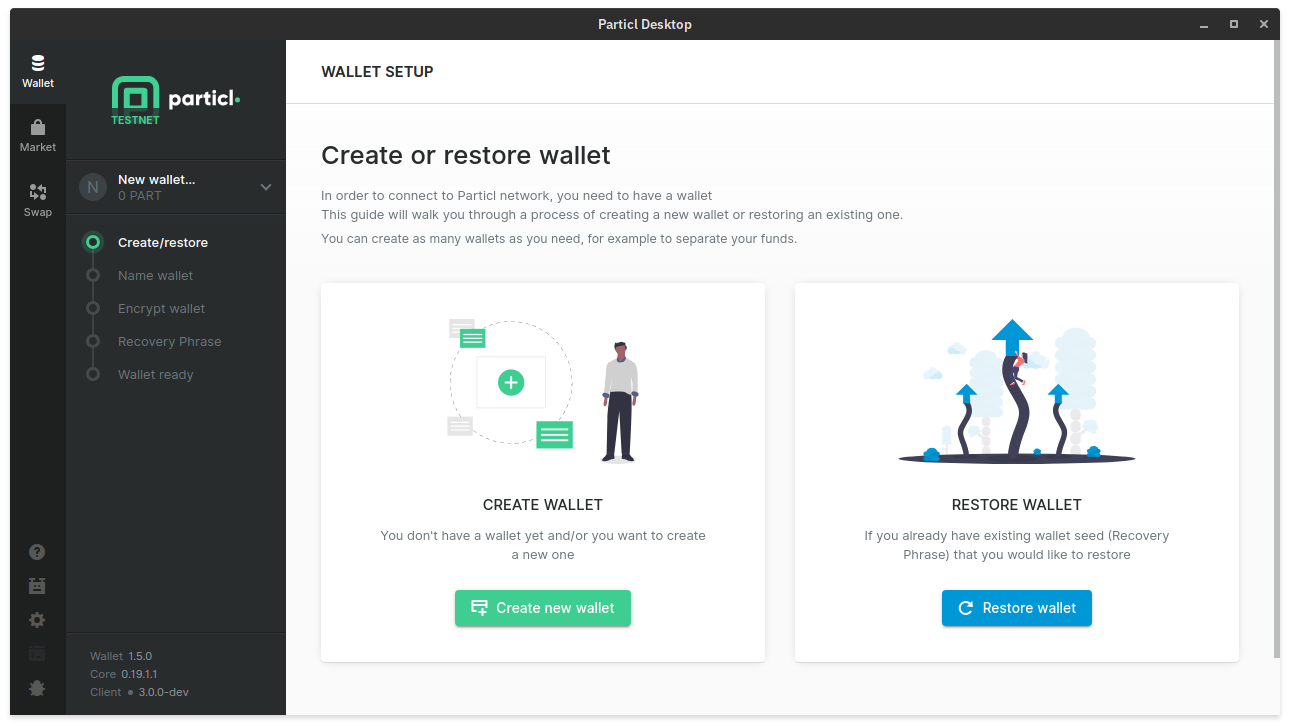
When you launch Particl Desktop for the first time, you’ll be prompted to create a new wallet. After all, without a working wallet, your Particl Desktop won’t be very useful.
If you already have a working wallet and want to create another one, you can easily do so by clicking on the wallet switcher in the left sidebar and choose Create a new wallet.
- Click on
Create new wallet - Choose an encryption password for your wallet and click on
Continue
This password is going to encrypt yourwallet.datfile.
You will need it each time you want to unlock your wallet and will also be required if you want to restore a backup of your wallet file.
- Carefully save the Recovery Phrase somewhere safe and click on
Continue
This 24-word seed allows you to restore your wallet without requiring the wallet.dat file nor your encryption password. Keep this Recovery Phrase safe!- To ensure you’ve properly saved your Recovery Phrase, enter the missing words in the empty fields
- (Optional) Pick a Recovery Password and click on
Continue
This password encrypts your Recovery Phrase.
If you opt to add a password and lose it, your seed becomes unusable. This password prevents someone to have access to your funds if they find your Recovery Phrase, but if you forget about the password, you will permanently lose access to your funds. It is advised to leave this field empty if you are not experienced.
- Let Particl Desktop setup your wallet – this step shouldn’t take more than a few minutes
If the client gets stuck and does not progress to the next step after more than 10 minutes, you can close and reopen it. This will give you access to your wallet, but you will need to manually generate public and private addresses by going to the receive tab and click on New public/private address.- Click on
Finish setupto have access to your newly created wallet. - Let the blockchain sync completely. You can track the progress by looking at the progress bar at the bottom left corner of the client.
Now when your new wallet is successfully created, it’s time to backup your wallet in case something terrible would happen e.g. with your PC. Never underestimate proper backups!
Secure the Particl network and earn staking rewards: